Well, its the first snowfall of the year, and the first snowfall we've had on our boat.
We bought the boat in April and though it was in the 30's for the first month, we never got snow. The temperatures have been below 30 for a few days and we've been running the Dickinson on medium/high pretty constantly. We're also running the electric heater in the mornings and that has been a big help to boost the temperature.
The Dickinson consumes somewhere between 1.29 and 3.20 gallons of diesel every 24 hours. Since we don't yet have a good way of sounding out tanks we've been estimating the usage and adding more fuel every 2 weeks. So far, we haven't run out, so at least our estimating skills are not too shabby.
Tuesday, December 14, 2010
Thursday, December 9, 2010
Winterizing
Winter is here and we've been getting the boat ready for the cold. The engine is cooled with sea water and so we have to flush it out lest it freeze and crack the engine block, sad christmas! I picked up some antifreeze and noticed it was good down to -53F or something. If it gets down to -53 anything in NY there's gonna be more problems than just out little engine!
So, in order to prevent hell, or Satan from freezing over we put in 3 gallons of the purple stuff(tm) Conveniently the sea water strainer hose could be unshipped and plunked right into the jug of antifreeze. This was nice as I could fire up the engine and let it draw on its own. Otherwise it would be a 2 person job involving funnels, hoses, and some duct tape, I'm sure.
With the engine put to bed we are focusing now on adding insulation to keep the heat in and cold out. Heat is provided by a Dickinson Newport diesel heater. It pretty awesome, I tell you what! It burns the same diesel our engine does so luckily we won't have to mess about with separate tanks and multiple fuels onboard. The main fuel tank had a second supply fitting already so we just tapped into that. Otherwise, we would have had to add a tee and that could cause fuel starvation to the engine potentially. Not that we're planning on venturing out in this weather, but at least we followed directions.
The top of the heater gets nice and hot and here I am reheating a bowl of yummy lentil soup. Having a window in the front is nice and adds a touch of cozy atmosphere. We've been adding reflectix insulation around the boat- behind lockers and settees and in cabinets. The boat is not well insulated so any little bit we can do helps out alot.
Its been in the low 30's lately and the heater has been doing a pretty good job. We've had to figure out the best way to balance the fuel and air mix to get a good clean burn, and we're still learning how to cope with steady winds and downdrafts. Once in a while we'll turn on the oil filled radiator to add a little more heat. Hopefully more insulation will eliminate the need for it though as electricity is not cheap around here.
Labels:
dickinson newport,
engine,
winter
Thursday, September 9, 2010
Water filter
We haven't had a need for hot water from our galley sink and adding hot water to it would add more complication to our fresh water system not to mention keeping water hot on demand. We would have to run the water heater all the time just to have hot water once in a while.
So, we decided to use the hot water tap of the galley sink and plumb in a water filter. The water was slightly metallic tasting, but not more than you would get from drinking out of a stainless steel thermos. We went with the Shurflo WaterGuard system. It uses replaceable filter cartridges which is nice. I installed a tee after the water pump- one side feeding the galley sink for washing dishes etc, and the other side feeding the water filter.
I mounted it in the 'Bad Space', a not so easy to access space outboard of the sink, and aft of the stove. Getting things in and out is even harder than with the old icebox. Why the architect designed the storage like he did is beyond me. In many boats of this size/class the space is used as a quarter berth.
Varnish update
The weather is definitely cooling off, the varnishing season will be over before I/you/we know it. The main hatch now has 4 coats on it, the ladder has 3 new coats on top of the old, but the treads will need alot more as they get very heavy use. The interior varnish is still holding up pretty well, but the handholds and a few other spots are pealing, so I'm tackling those slowly.
The veneer is in sad shape (right: lower right) and we'll have to do something about it.
I believe the interior is Burmese teak as it is more reddish than golden.. but I might be wrong.
Wednesday, September 8, 2010
New Binoculars
We lost our boat binoculars in spectacular firefight with some alien pirates off the coast of... Ok, that's not really what happened. They went for a swim just off of the G "5" buoy in Port Jefferson harbor.
So I had an opportunity to get a new pair with some bells and whistles. I got a pair with a built in compass and optical rangefinder and... they float.
These are 7x50, whereas the last pair was 10x30 which meant a little more magnification (10x), but less field of view and not as bright (30mm). 7x magnification is apparently the most zoom that the average person can manage to hand hold comfortably on a boat less than 50ft. I don't disagree- on the other hand, I didn't have trouble with 10x.
Labels:
equipment
Thursday, September 2, 2010
Steering refit
We've been using the emergency tiller to steer the boat, which for a 36' boat isn't too crazy. I've heard some people say that wheels on boats under 40' are unwieldy (unwheeldy? har har) and not efficient. In any case, the tiller attaches to the top of the rudder post and provides a 3' lever that makes steering easy for one person. When we came down the Sound in May during a storm there were points when Emily and I were both putting our full weight in the tiller to steer the boat- that was fun and not scary at all.
Fixing the steering has been on our list of projects, but as the tiller works, it's been on the back burner. The system is a rudder attached to a post that comes up through the hull upon which the quadrant, a pie shaped metal piece about 12 inches in radius the center being fixed to the rudder post so that as the quadrant rotates from side to side on its axis the rudder is in turn moved. The arc of the quadrant has an upper and lower track that the steering cable rides in and as the cable is pulled from one side or the other the quadrant moves. The cable is wound around a drum at the bottom of the steering pedestal and so as the Wheel turns, the cable is taken up on one end of the drum and unwound on the other in turn moving the rudder. Whew, wouldn't a picture have been more clear? Yes.
This is a simple sketch showing a side view (port). There are 2 more sheaves (pulleys to you landlubbers) between the drum and the quadrant that change the direction of the cable and alter its angle between the two.
So, we have a drum, a rudder, a rudder post, a quadrant... but no cable. So I've been researching the cable dimensions and the proper way in which to reeve (sailor talk for passing line or rope or similar through or around another object) the cable around the drum and the quadrant. Here is the drum which is in need of cleaning and re-greasing.
Cabin top cleaning
We had not paid much attention to the fiberglass gelcoat on the cabin top since we purchased Mola Mola and it was in bad shape then. Fiberglass boats are coated often coated with an epoxy or polyester resin that provides a glossy finish to the fiberglass that protects it from UV and light physical damage. It is not impervious to wear and after a few seasons begins to oxidize, turning dull and chalky. Our boat was at the very dull and very chalky stage and I thought it would be a good idea to clean it. I purchased 3M Restorer & Wax that cleans up heavy oxidation and has a built in wax component. It worked like a charm and the cabin top is much much nicer looking, almost shiny in parts. Before too long though, we'll have to sand off all the gelcoat and repaint it as there are several deep gouges and chips in it. We could re-gelcoat it which is expensive and tricky to do I'm told, but Petit and Interlux make very good polyurathane topcoats that will more than fit the bill.
The first picture is a sample of what the cabin top looked like. The oxidized gelcoat traps dirt and oils and regular soaps and detergents don't even touch them which is why I went to a specialty product. The second is chalky gelcoat which washed off and was suprisingly hard to get off my hands. The last two are pictures of the cabin top after cleaning.
1 out of 1 Chaz agrees: Human hair is the best paint brush!
We finished cleaning out the icebox cavern and got it coated in primer. This helps us to visualize how we would like to construct the new cabinets. We use Gripper primer as it is very durable and resilient. It fills in small scratches and gaps very nicely and dries wicket fast. We primed everything in April with it and it still looks great even in the head and bilge where it gets very wet.
In painting the ice box space I had to lean way in to reach the inner hull. No paint job is complete without getting some in your hair, and so I did. The space looks nice and clean and we've pretty much figured out what we want to do for cabinets. Woohoo!
Batten down Varnish the Hatches!!
After letting the polysulphide caulk cure a good long time, I've put the first 2 coats of varnish on the main hatch. Very exciting!
The teak used on the hatch is much more golden in color than the teak of the coamings and railings leading us to believe it is a different variety of teak. Teak at the time of the boat's building would have come from Indonesia or Burma, so presumably the teak used on the boat could be a mixture of both.
Tuesday, August 31, 2010
The companionway ladder has been getting a lot of wear and needed to get refinished badly. The lower rung (top of frame) gets the least wear, which is why it still retains more of the dark golden brown varnish than the upper rung.
Here is the ladder after the first new coat of varnish, possibly in 10+ years.
Monday, August 23, 2010
Rainy day fun
There are winds steady around 20 kts, and gusting to 30... so no varnishing today.
The boat is rocking about quite a bit, and I've doubled up the dock lines. To be more precise, I added 6 more to the usual 3.
Normally, 3 dock lines are sufficient to keep the boat parked. With gusting winds and waves, it is necessary to better secure the boat when the parking lot goes crazy.
Here is a high-tech model showing how waves fetched along the sound go crazy when they round Harte's Island. We live at 'X'.
On a regular day, light winds can create rolling swells that are fun and remind us we live on a boat. On days like today, the wind and waves hit us on the beam and then the shallow shore reflects them right back out on the opposite beam. Yee haw!
I said all of that to say this:
Its rainy today, so I worked on indoor projects. We're still drafting up plans for what to do with our icebox space and here is one permutation. I'm using Google Sketchup because I'm a nerd.
Labels:
living aboard,
projects
Friday, August 20, 2010
The continuing story of varnishing bill... er chaz
The handrails and cockpit coamings have their first coat of varnish on!
Oooooh! shiny!
Oooooh! shiny!
Thursday, August 19, 2010
The first rule of varnish club is...
1. You don't worry the varnish.
2. You do NOT worry the varnish.
3. Wherever you put a freshly varnished piece to be out of the way will invariably be the corner you varnish yourself into.
4. Human hair has special magnetic properties that propel it towards fresh varnish, sometimes taking the person it's attached to with it.
5. also, polarized sunglasses can make it difficult to see new varnish going on previous layers.
I had a captain once who made a rule that we weren't allowed to wear sunglasses while varnishing because of this. To which another captain I know would have rebuked, "It's not a piano." I wear my sunglasses when I varnish- and sometimes at night.
Varnish tally:
laz hatch: 3
cabin trunk trim: 3
weatherboards #1: 2, #2: 1, #3: 2
main hatch trim: 1
binnacle: 1
chaz: 0
Wednesday, August 18, 2010
Double Footrope Knot
This is the knot I used on the lifelines gate thimble side. Traditionally this form was used as the knot at the end of a rope held over the side of a ship for a sailor to get a foot hold to climb aboard... a foot rope, if you will.
The doubled version here is simple the single version with the strands led along and under the first pass of the two comprising knots, a wall and a crown.
Labels:
marlinspike
Recaulking the main hatch
I finally got around to caulking the hatch which we stripped and oiled over a month ago. I cleaned out the seams with acetone and then taped them.
We're using Boatlife LifeCaulk, a sticky, sticky, polysulfide compound that is formulated for oily woods, like teak. Its scarily icky and I went through many gloves during the process. Once the caulk skinned over, I pulled the tape. Taking the tape off was messy as I didn't leave any tape handles to get it off of the individual planks, so I used a utility knife and carefully picked up tape corners, trying not to smear the caulk.
I think it came out swimmingly, in a couple days we'll be able to start varnishing the hatch.Varnishing round 2
This morning is about 73 deg/f and so I got another coat of varnish on.
laz hatch: 2
cabin trunk trim: 2
weatherboards 1,3: 1
weatherboard sill: 1
I'm still using heavily cut Epiphanes on these first coats.
laz hatch: 2
cabin trunk trim: 2
weatherboards 1,3: 1
weatherboard sill: 1
I'm still using heavily cut Epiphanes on these first coats.
Tuesday, August 17, 2010
New life for old lifelines
Ok, that's not true. We're scrapping our old lifelines and placing them with much more boaty looking ones made of 3 strand nylon/polyester line. One of the machine swaged terminals slipped off during a transit, luckily no one was on the foredeck when it parted.
The gates are made up of a riggers eye splice around a stainless steal thimble. After 3 full tucks I put a double footrope knot finished by seizing the strands around the standing end. The footrope knot keeps the gate eye from jamming into the stanchion and allows tension to be maintained on the rest of the lifeline. The opening end of the lifeline gate will have these spiffy bronze pelican hooks spliced onto them. To keep tension on the forward end of the gates I have tied single strand double Matthew Walker knot. I think the technical name for the know is a Double Overhand Stopper knot, but in structure, I think it could be rightly called a Matthew Walker knot tied with one lead, and then doubled. However, in that case it might be like the Fibonacci sequence in that the first number in the sequence is not the sum of itself and the previous term. So... perhaps there is no single lead Matthew Walker knot, no Fibonacci sequence, and no damn cat, and no damn cradle.
And here is what one of the finished gates looks like.
Labels:
lifelines,
marlinspike,
projects
Woohoo! Varnish!
Dear Diary,
Today I put on the first new varnish this boat has seen in at least 10 years. We're using Epifanes High Gloss Clear Finish. The first coat is cut with Penetrol and it did indeed brush on quite smoothly. We're using Epifanes since it came highly recommended, is compatible with teak (and other oily woods). It also claims to be recoatable within 72 hours without sanding. I am not sure if that is enough of a selling point in and of itself, as I have found a light sanding is almost always needed due to dust when varnishing outside. We'll see.
Here are pictures of the laz hatch (lazerette), and the weatherboards for the main hatch.
"A lazarette is usually a storage locker used for gear or equipment a sailor or bosun would use around the decks on a sailing vessel. It is typically found below the weather deck in the stern of the vessel and is accessed through a hatch if accessed from the main deck or a doorway if accessed from below decks. The equipment usually stored in a lazarette would be spare lines, sails, sail repair, line and cable splicing repair equipment, fenders, bosun chair, spare blocks, tools etc." -wikipedia 2010Next up are the handrails and followed by the toe rails- at least as far as first coats go.
Sunday, August 15, 2010
Pedestal repaint
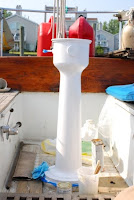
The pedestal on our boat is the original Cheoy Lee Edson knockoff. The wheel turns a beveled pinion which turns a matching gear attached to a shaft that turns a drum just below the cockpit sole. Edson steerers have a chain sprocket driven by the wheel, the bicycle type chain is bent directly to two lengths of cable which are riven through two sheaves outboard and then to opposite sides of the quadrant. The Cheoy Lee version has a single cable doubled in the middle at the drum and then led as the Edson models. I said all of that so that I could say this: our steering is broken. The starboard sheave broke free from the hull and the cable and its splicing hardware is missing. I have since reglassed the sheave block to the hull and overhauled both sheaves. I just need to find specs on the cable to use for the system and then reassemble it.
In the meantime, I have taken the pedestal which was flaking badly down to bare metal and primed and topcoated it with Interlux Brightsides. Its all shiny and new looking- to bad it doesn't do anything yet.
Ice box project
The ice box on the our boat, which is essentially the same as that on the Cheoy Lee Clipper 36's, was no longer insulating very well and was a real pain to access and use on a regular basis. We figure that an occasional cruise or weekend trip on the boat would be fine and the crew could make due with it, but it was very deep, and one pretty much falls into it head first when reaching for anything.For living aboard though, we needed a refridgeration system that could maintain cool temperatures and be more accessable. We also didn't need such a huge volume of space devoated to cooling. Two 5lb bags of ice last about 2 days in 80 degree weather and still only got the ice box down to 60 degrees. So the it had to go. In the meantime we picked up a small dorm style fridge serves our space and cooling needs.
We took saw, hammer, grinder and crowbar to the ice box and after about 5 hours of work and 15 trash bags full (trash bag fulls?) of insulation and debris finally stripped the ice box down to the hull. We have been drawing up ideas on how to rebuild the space in such a way that we can access it all easily. The wet locker space, which is behind the ice box and under the forward end of the starboard cockpit seat is very difficult to access and we're hoping to incorporate it into the new cabinetry plans.
As you can see, the fiberglass is almost 3/4" inch thick in some places. We went through alot of discs and blades to get it all out. The insulation was glued to the hull and bulkheads and required alot of hacking and digging (and lots of styrofoam squeaking!) to get it all cleaned out.
Next we'll clean the area really good, and make any glass repairs before adding cleats and stringers to build the new cabinets onto.
Saturday, August 14, 2010
Pizza Time!
We made pizza tonight. I made the dough a la the Joy of Cooking and Emily made a pesto topping. This is the second time we've made pizza this way. We make the dough, and precook it in the skillet and then top it and finish cooking it with a lid on. Mmmmm
Thin crust pizza seems to work well this way, but I don't think the skillet/burner setup will do right by a thicker crust. We'd like to get a convection/toaster oven so we can rule the world... I mean, cook a wider variety of foods.
Labels:
cooking
Friday, August 13, 2010
Sandy, sandy... scrapey, scrapey
We've been working on the brightwork, toe rails, hatches, weatherboards, etc. They are all the original teak and in pretty bad repair. We've scraped and sanded them all- using a heat gun to help get the varnish off. The heat gun works wonders on the varnish which was flaking in some spots and rather thick in others. The heat gun makes the varnish crackle and then it scrapes right off.
After sanding the teak down to bare wood to its natural golden honey color we applied Watco Teak Oil. After we apply a few coats of oil we wet sand with the teak oil and 500 grit sand paper to get the wood nice and smooth. Our plan is to let a few coats oil soak in we'll varnish it with several coats of Epifanes Clear Gloss and a couple more of Epifanes Wood Finish for added UV protection.
Subscribe to:
Posts (Atom)