Tuesday, August 31, 2010


The companionway ladder has been getting a lot of wear and needed to get refinished badly. The lower rung (top of frame) gets the least wear, which is why it still retains more of the dark golden brown varnish than the upper rung.

Here is the ladder after the first new coat of varnish, possibly in 10+ years.

Monday, August 23, 2010

Rainy day fun

There are winds steady around 20 kts, and gusting to 30... so no varnishing today.
The boat is rocking about quite a bit, and I've doubled up the dock lines. To be more precise, I added 6 more to the usual 3.
Normally, 3 dock lines are sufficient to keep the boat parked. With gusting winds and waves, it is necessary to better secure the boat when the parking lot goes crazy.
Here is a high-tech model showing how waves fetched along the sound go crazy when they round Harte's Island. We live at 'X'.


On a regular day, light winds can create rolling swells that are fun and remind us we live on a boat. On days like today, the wind and waves hit us on the beam and then the shallow shore reflects them right back out on the opposite beam. Yee haw!

I said all of that to say this:
Its rainy today, so I worked on indoor projects. We're still drafting up plans for what to do with our icebox space and here is one permutation. I'm using Google Sketchup because I'm a nerd.


Friday, August 20, 2010

The continuing story of varnishing bill... er chaz

The handrails and cockpit coamings have their first coat of varnish on!
Oooooh! shiny!


The toe rails and main hatch are the only things that remain.

laz hatch: 3
cabin trunk trim: 3
main hatch exterior trim: 3
weather boards: #1: 3, #2: 2, #3: 3
main hatch interior trim: 2
binnacle: 2
handrails: 1
coamings: 1

Thursday, August 19, 2010

The first rule of varnish club is...


1. You don't worry the varnish.
2. You do NOT worry the varnish.
3. Wherever you put a freshly varnished piece to be out of the way will invariably be the corner you varnish yourself into.
4. Human hair has special magnetic properties that propel it towards fresh varnish, sometimes taking the person it's attached to with it.
5. also, polarized sunglasses can make it difficult to see new varnish going on previous layers.

I had a captain once who made a rule that we weren't allowed to wear sunglasses while varnishing because of this. To which another captain I know would have rebuked, "It's not a piano." I wear my sunglasses when I varnish- and sometimes at night.

Varnish tally:
laz hatch: 3
cabin trunk trim: 3
weatherboards #1: 2, #2: 1, #3: 2
main hatch trim: 1
binnacle: 1
chaz: 0

Wednesday, August 18, 2010

Double Footrope Knot

This is the knot I used on the lifelines gate thimble side. Traditionally this form was used as the knot at the end of a rope held over the side of a ship for a sailor to get a foot hold to climb aboard... a foot rope, if you will.

The doubled version here is simple the single version with the strands led along and under the first pass of the two comprising knots, a wall and a crown.

First a wall, then a crown
tie it up, then tie it down.
-Ashley Book of Knots


Recaulking the main hatch

I finally got around to caulking the hatch which we stripped and oiled over a month ago. I cleaned out the seams with acetone and then taped them.


We're using Boatlife LifeCaulk, a sticky, sticky, polysulfide compound that is formulated for oily woods, like teak. Its scarily icky and I went through many gloves during the process. Once the caulk skinned over, I pulled the tape. Taking the tape off was messy as I didn't leave any tape handles to get it off of the individual planks, so I used a utility knife and carefully picked up tape corners, trying not to smear the caulk.
I think it came out swimmingly, in a couple days we'll be able to start varnishing the hatch.


Varnishing round 2

This morning is about 73 deg/f and so I got another coat of varnish on.

laz hatch: 2
cabin trunk trim: 2
weatherboards 1,3: 1
weatherboard sill: 1

I'm still using heavily cut Epiphanes on these first coats.

Tuesday, August 17, 2010

New life for old lifelines

Ok, that's not true. We're scrapping our old lifelines and placing them with much more boaty looking ones made of 3 strand nylon/polyester line. One of the machine swaged terminals slipped off during a transit, luckily no one was on the foredeck when it parted.


The gates are made up of a riggers eye splice around a stainless steal thimble. After 3 full tucks I put a double footrope knot finished by seizing the strands around the standing end. The footrope knot keeps the gate eye from jamming into the stanchion and allows tension to be maintained on the rest of the lifeline. The opening end of the lifeline gate will have these spiffy bronze pelican hooks spliced onto them. To keep tension on the forward end of the gates I have tied single strand double Matthew Walker knot. I think the technical name for the know is a Double Overhand Stopper knot, but in structure, I think it could be rightly called a Matthew Walker knot tied with one lead, and then doubled. However, in that case it might be like the Fibonacci sequence in that the first number in the sequence is not the sum of itself and the previous term. So... perhaps there is no single lead Matthew Walker knot, no Fibonacci sequence, and no damn cat, and no damn cradle.


And here is what one of the finished gates looks like.

Woohoo! Varnish!

Dear Diary,
Today I put on the first new varnish this boat has seen in at least 10 years. We're using Epifanes High Gloss Clear Finish. The first coat is cut with Penetrol and it did indeed brush on quite smoothly. We're using Epifanes since it came highly recommended, is compatible with teak (and other oily woods). It also claims to be recoatable within 72 hours without sanding. I am not sure if that is enough of a selling point in and of itself, as I have found a light sanding is almost always needed due to dust when varnishing outside. We'll see.


Here are pictures of the laz hatch (lazerette), and the weatherboards for the main hatch.
"A lazarette is usually a storage locker used for gear or equipment a sailor or bosun would use around the decks on a sailing vessel. It is typically found below the weather deck in the stern of the vessel and is accessed through a hatch if accessed from the main deck or a doorway if accessed from below decks. The equipment usually stored in a lazarette would be spare lines, sails, sail repair, line and cable splicing repair equipment, fenders, bosun chair, spare blocks, tools etc." -wikipedia 2010
Next up are the handrails and followed by the toe rails- at least as far as first coats go.

Sunday, August 15, 2010

Pedestal repaint

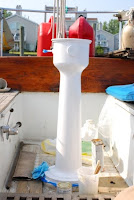
The pedestal on our boat is the original Cheoy Lee Edson knockoff. The wheel turns a beveled pinion which turns a matching gear attached to a shaft that turns a drum just below the cockpit sole. Edson steerers have a chain sprocket driven by the wheel, the bicycle type chain is bent directly to two lengths of cable which are riven through two sheaves outboard and then to opposite sides of the quadrant. The Cheoy Lee version has a single cable doubled in the middle at the drum and then led as the Edson models. I said all of that so that I could say this: our steering is broken. The starboard sheave broke free from the hull and the cable and its splicing hardware is missing. I have since reglassed the sheave block to the hull and overhauled both sheaves. I just need to find specs on the cable to use for the system and then reassemble it.


In the meantime, I have taken the pedestal which was flaking badly down to bare metal and primed and topcoated it with Interlux Brightsides. Its all shiny and new looking- to bad it doesn't do anything yet.

Ice box project


The ice box on the our boat, which is essentially the same as that on the Cheoy Lee Clipper 36's, was no longer insulating very well and was a real pain to access and use on a regular basis. We figure that an occasional cruise or weekend trip on the boat would be fine and the crew could make due with it, but it was very deep, and one pretty much falls into it head first when reaching for anything.For living aboard though, we needed a refridgeration system that could maintain cool temperatures and be more accessable. We also didn't need such a huge volume of space devoated to cooling. Two 5lb bags of ice last about 2 days in 80 degree weather and still only got the ice box down to 60 degrees. So the it had to go. In the meantime we picked up a small dorm style fridge serves our space and cooling needs.

We took saw, hammer, grinder and crowbar to the ice box and after about 5 hours of work and 15 trash bags full (trash bag fulls?) of insulation and debris finally stripped the ice box down to the hull. We have been drawing up ideas on how to rebuild the space in such a way that we can access it all easily. The wet locker space, which is behind the ice box and under the forward end of the starboard cockpit seat is very difficult to access and we're hoping to incorporate it into the new cabinetry plans.


As you can see, the fiberglass is almost 3/4" inch thick in some places. We went through alot of discs and blades to get it all out. The insulation was glued to the hull and bulkheads and required alot of hacking and digging (and lots of styrofoam squeaking!) to get it all cleaned out.

Next we'll clean the area really good, and make any glass repairs before adding cleats and stringers to build the new cabinets onto.

Saturday, August 14, 2010

Pizza Time!

We made pizza tonight. I made the dough a la the Joy of Cooking and Emily made a pesto topping. This is the second time we've made pizza this way. We make the dough, and precook it in the skillet and then top it and finish cooking it with a lid on. Mmmmm


Thin crust pizza seems to work well this way, but I don't think the skillet/burner setup will do right by a thicker crust. We'd like to get a convection/toaster oven so we can rule the world... I mean, cook a wider variety of foods.

Friday, August 13, 2010

Sandy, sandy... scrapey, scrapey

We've been working on the brightwork, toe rails, hatches, weatherboards, etc. They are all the original teak and in pretty bad repair. We've scraped and sanded them all- using a heat gun to help get the varnish off. The heat gun works wonders on the varnish which was flaking in some spots and rather thick in others. The heat gun makes the varnish crackle and then it scrapes right off.


After sanding the teak down to bare wood to its natural golden honey color we applied Watco Teak Oil. After we apply a few coats of oil we wet sand with the teak oil and 500 grit sand paper to get the wood nice and smooth. Our plan is to let a few coats oil soak in we'll varnish it with several coats of Epifanes Clear Gloss and a couple more of Epifanes Wood Finish for added UV protection.